Now we all have been there. You get a model from a customer or someone in your company and they drew it in on a different axis system or gave you the part straight from an assembly, causing it to be orientated weirdly or awkwardly.
Now you, who do not even have enough time to program the part, have to pull off some ninja special guru orientation moves to get it into your Top plane.
In this article, I want to make that a struggle of the past with this very easy tip that not a lot of Mastercam users know.
It’s called Align to Z and believe me when I say it… It is going to make your life so much easier!
Okay so let say you have the following part.
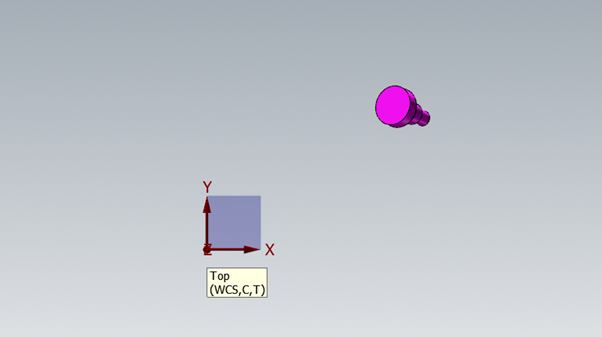
I know… I would rather face my own wife! (Nightmares!)
How we are going to fix this is to go to the Model Prep tab and then, under the Layout section, Align to Z.
Now, it’s going to ask you to select the solid, but you should pay special attention to where you select. You want to select the face of a cylindrical part whose center is going to be in the place and to the side you want your WCS to be.
In the figure below you can see I choose the cylindrical feature of the solid that glows.
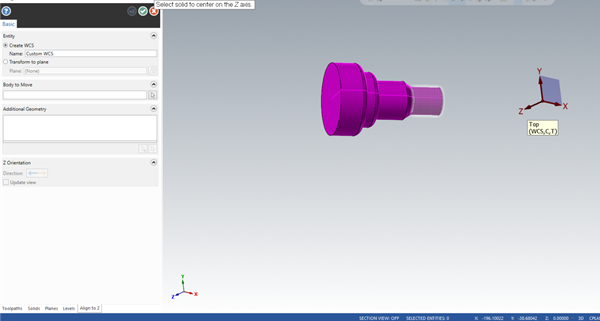
Now, Mastercam is going to orientate the part and give you a Temporary Align To Z Plane. If you want to create a new WCS for this part, you can then move this Temp plane around so that it would fit your application.
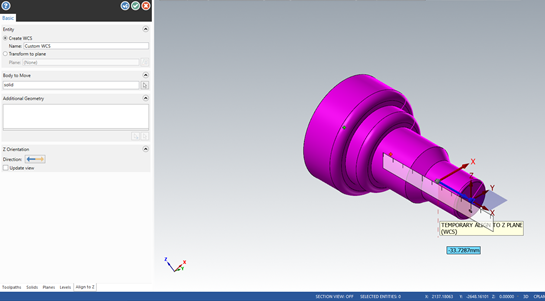
But what we want to do is to Transform it to the Top plane. To do this, we must look to the left on the basic parameter of the function.
Here we can select Transform to plane
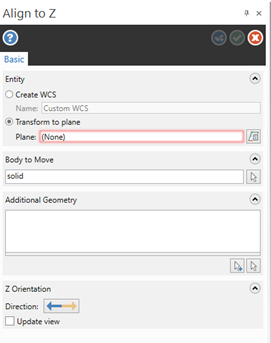
I would then click on the button to the right and select Top Plane.

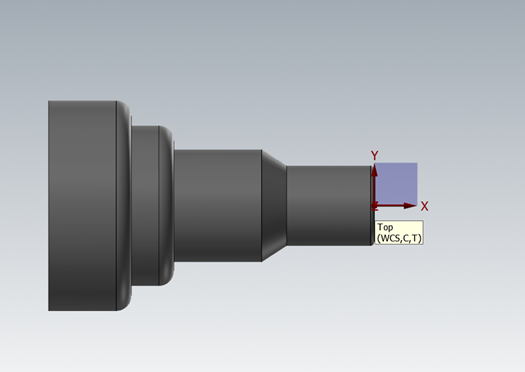
After that, you can just green check out of everything, and before you know it there is your part orientated in the top plane!
I would encourage you to try Align to Z in your shop to see how you could save time and frustration with orientating parts. For more information on Mastercam please contact us at MECAD Manufacturing.