So, you use the same cutting tools and toolpaths to do your roughing and your finishing operations time and time again. After a long time of fine-tuning parameters and settings in Mastercam, you are finally happy with the results you are getting. Ever wondered if there was a faster way to get your part programmed in Mastercam? What if you could re-use those honed toolpaths over and over from part to part by simply selecting your new part’s geometry and containment?
Well, today I want to show you a nifty little time-saver that will get you from part to machining in a fraction of the time!
Let’s get cracking!
In the screenshot below, I have saved my part file to my Desktop for illustration purposes.
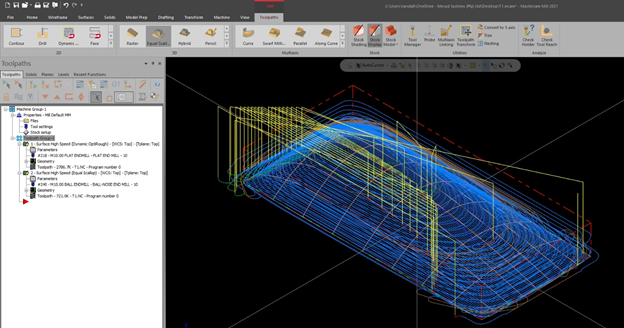
In my saved file I have created a Dynamic Opti-Rough and an Equal Scallop Toolpath in Mastercam to rough and finish the surface body above.
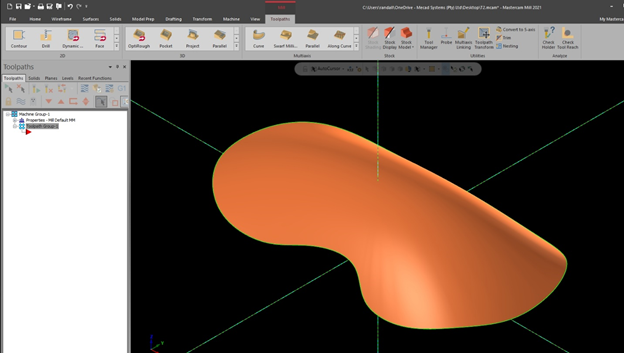
Next, as seen below, I have opened a different surface part with slightly different curvature and form. For this to work, we will need to first load up a Machine in Mastercam as can be seen below:
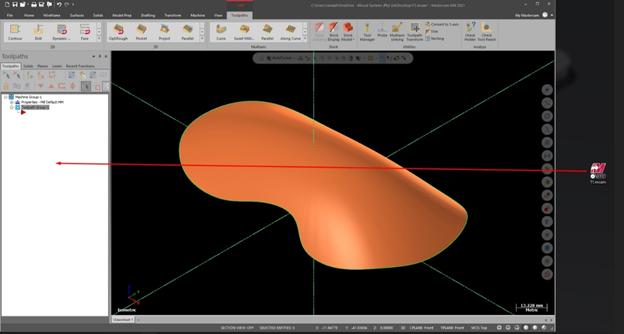
The next step in the process is to drag our saved desktop file into the Mastercam Toolpaths Manager area as illustrated below:
The “Import Toolpaths Operations Manager” will now appear where we can cherry-pick all the toolpaths we need to rough and finish the above part:
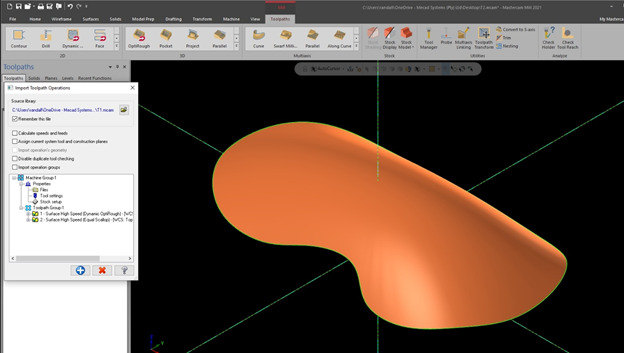
Once we have selected our required toolpaths, we can click on the “Blue +” sign and “OK” to accept our selections, followed by the “Red X” to close the Manager as seen above. The following image below shows the imported toolpaths marked as “Dirty” with a red “X” next to them. This is because Mastercam did not import the original files part geometry and containment that was specified for selection in our previously saved desktop part. See the below image:
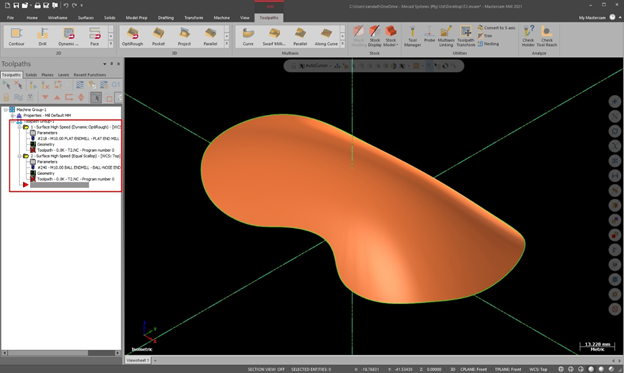
Our next step is to select our new parts geometry and containment so that we can “Regenerate” our 2 Toolpaths. In our Model Geometry selection window, we can click on the little white pointer as illustrated below to select our new geometry:
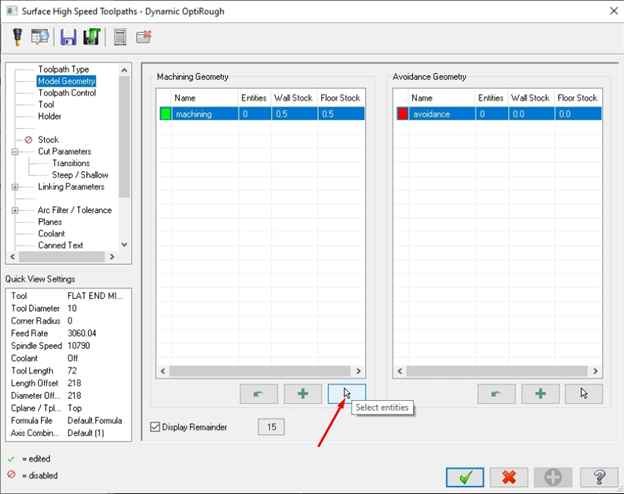
We will do the same for both operations. Don’t forget to reselect your containment area if required too.
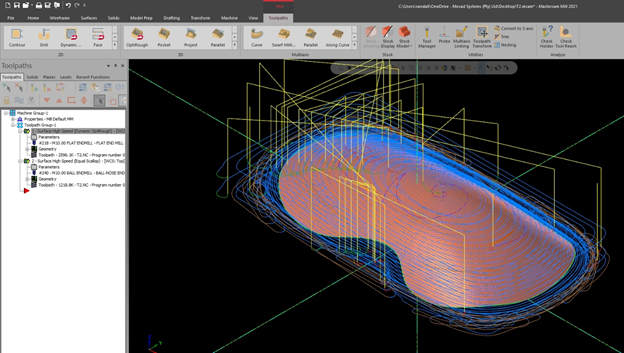
The final step is to regenerate all your toolpaths and you should then end up with your new part fully programmed as seen below:
Written by Randall Felix (Applications Engineer)